Tutorial
This guide will walk you through setting up a target language, composite font, authoring and translating the text inside Game Maker and seeing your work in game.
In it you will:
- Set up Game Maker Font Assets
- Set up a Cultured Composite Font for English and Korean
- Set up up a Cultured Composite Sprite for English and Korean
- Author Localizable Text in
.gml - Translate to Korean Text in Culctured Dashboard
- Render Localized Text and Sprites in a draw event
See the Translating Text page to see the full pipeline.
Project Setup
- Follow the Installation Guide and ensure you have access to the Cultured Dashboard in
Tools -> Culturedand access thegmlfunctions from the Runtime package. - Choose or create an object in your project that draws on the screen to build the example in.
- Download and install the English and Korean example fonts: NotoSan and NotoSansKR
- Download or create your own English and Korean images containing English and Korean text if you want to follow along with the Composite Sprite part of this tutorial.
Downloadable Images To Use
Import these sprites to your Game Maker project if you want to follow along with the Composite Sprite part of this tutorial.
Right click -> Save as

Set up your Native and Target languages
In the Cultured Dashboard navigate to the Languages tab and add a Target language to translate into. This guide will choose Korean as the Target Language, you can use anything you like but later this guide will also use Korean fonts.
You should leave the native language option as English unless you're using a different language for all of your games native (untranslated) text.
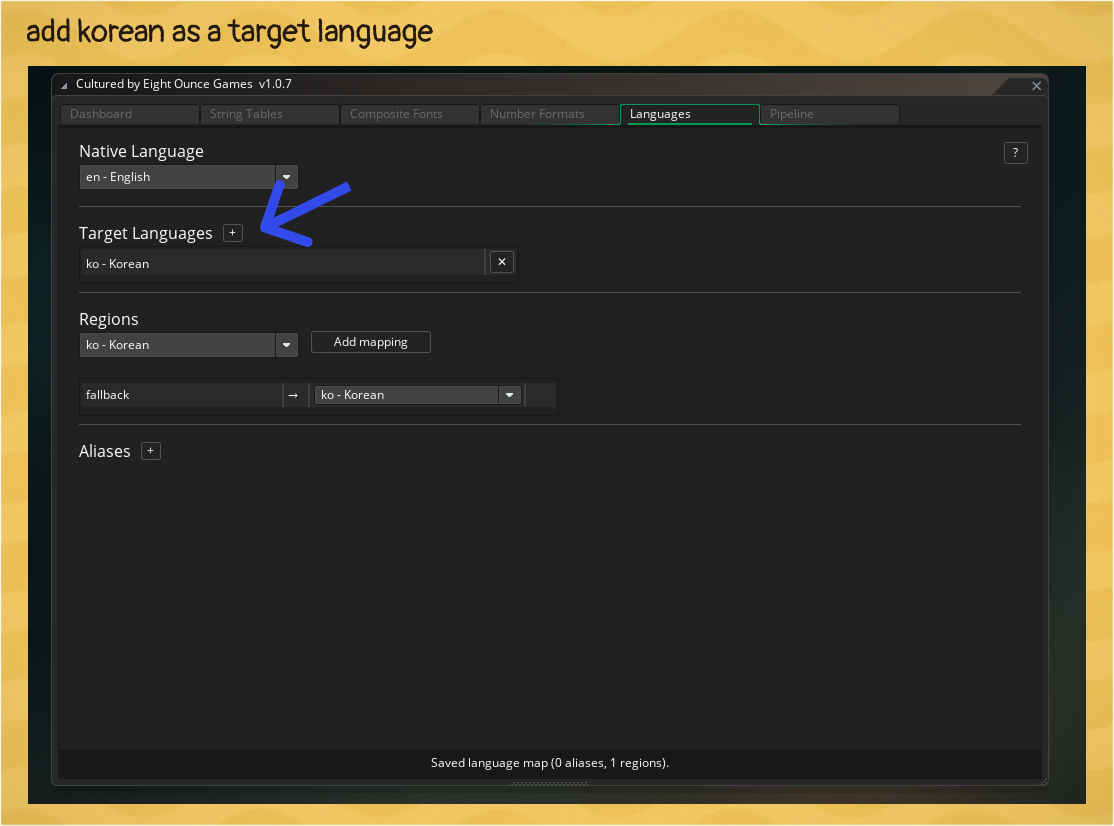
- Native language is the language you author your text in before handing it over to translators.
- Target languages are additional languages your game supports after handing it over to translators.
Set up your fonts
The target language for this guide is Korean. If you haven't already download and install NotoSan and NotoSansKR from Google fonts and install them to your PC. If you already have fonts you want to use then you can just use those instead of downloading them.
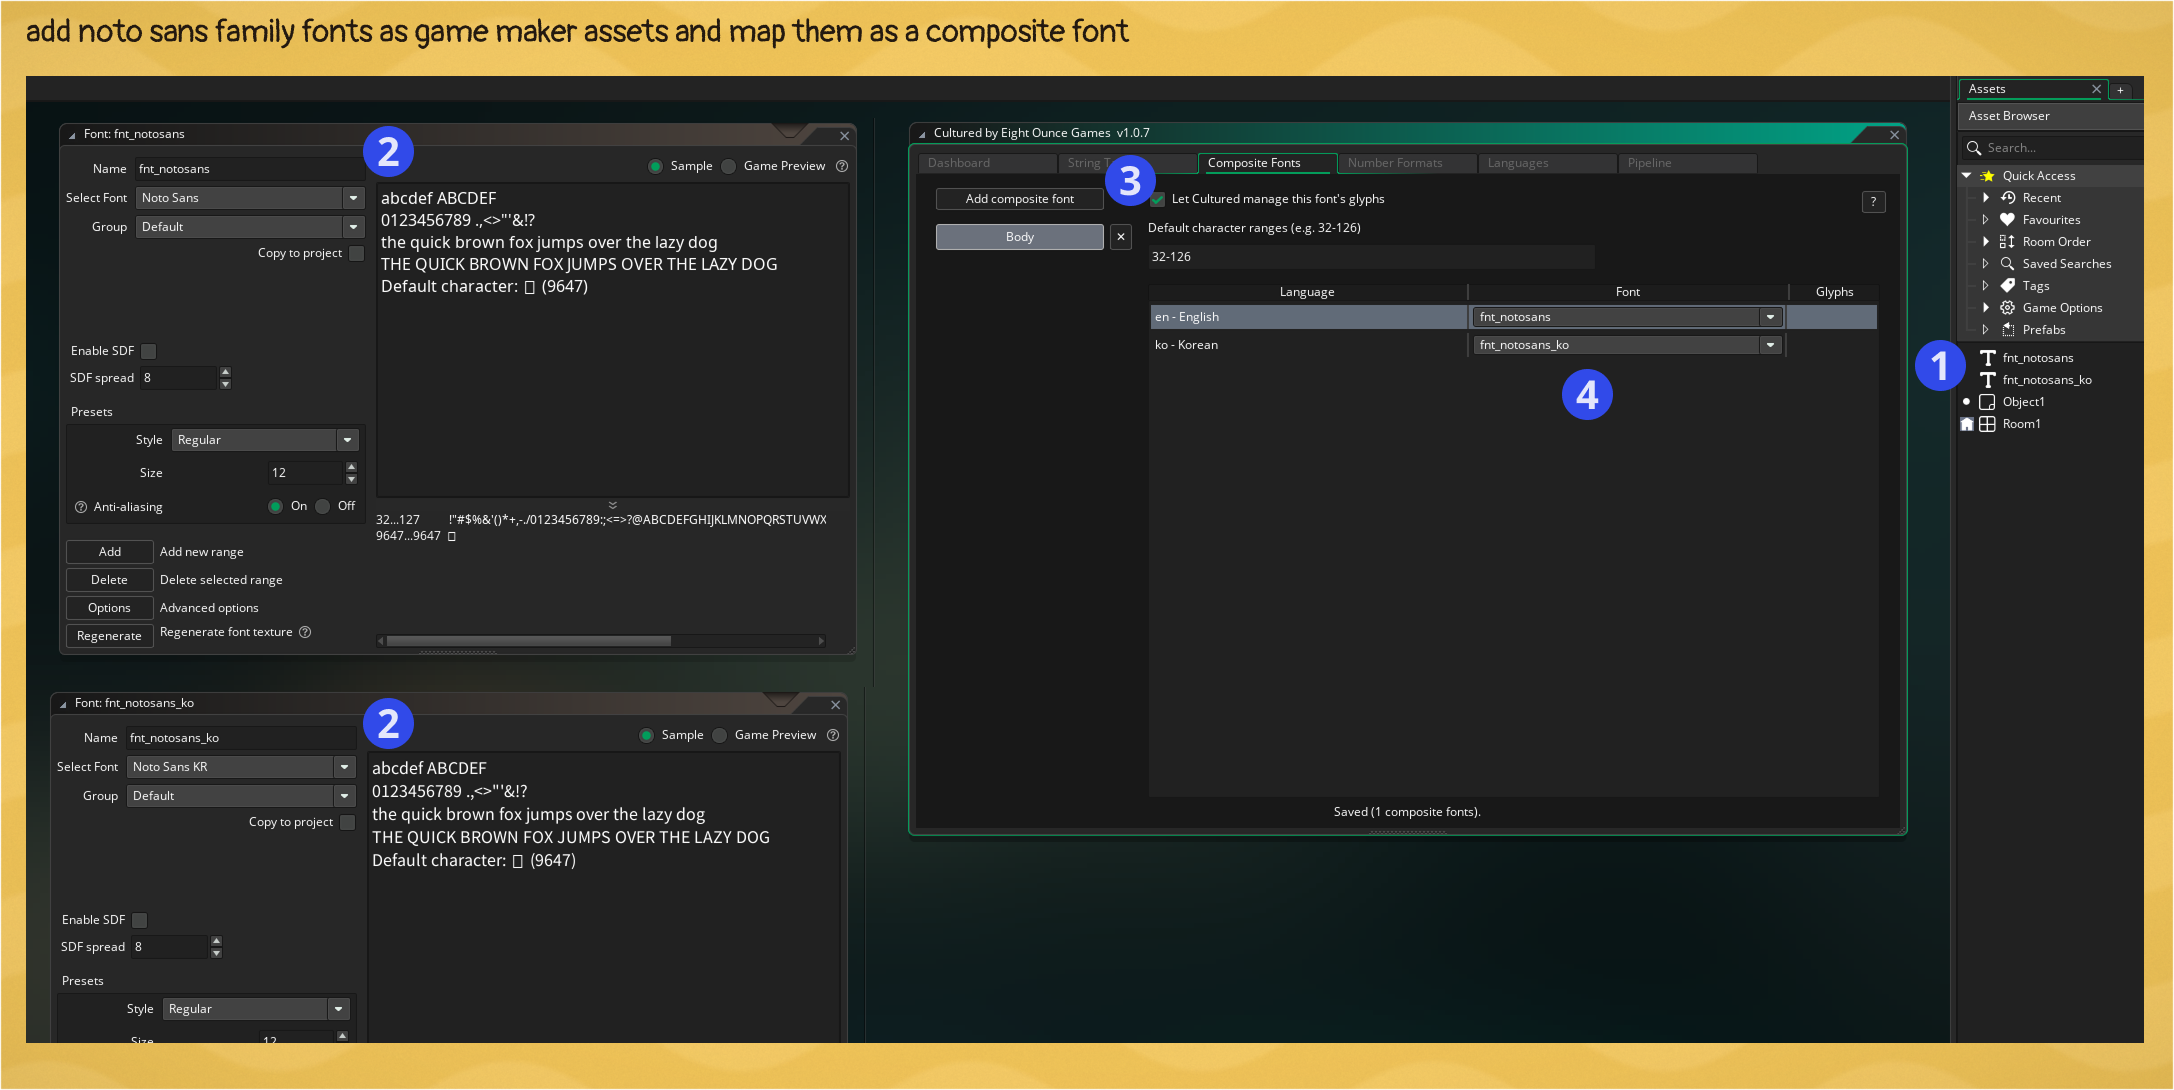
- Right click in the asset browser and create two new Font Assets
- Link the new Font Assets to your desired system installed fonts. This guide uses NotoSans family from Google Fonts. If you've installed fonts to your system while Game Maker is running you will have to restart Game Maker before it loads your new fonts.
- Click "Add Composite Font" in Cultured Dashboard -> Composite Fonts
- Map the correct language to the correct font.
Author Native Text
In your chosen test object add the following code to the create event.
// at the same time this both authors the text that will
// appear in Cultured Dashboard and returns the localized
// text struct
my_text = cultured("Hello World");
Translating Text
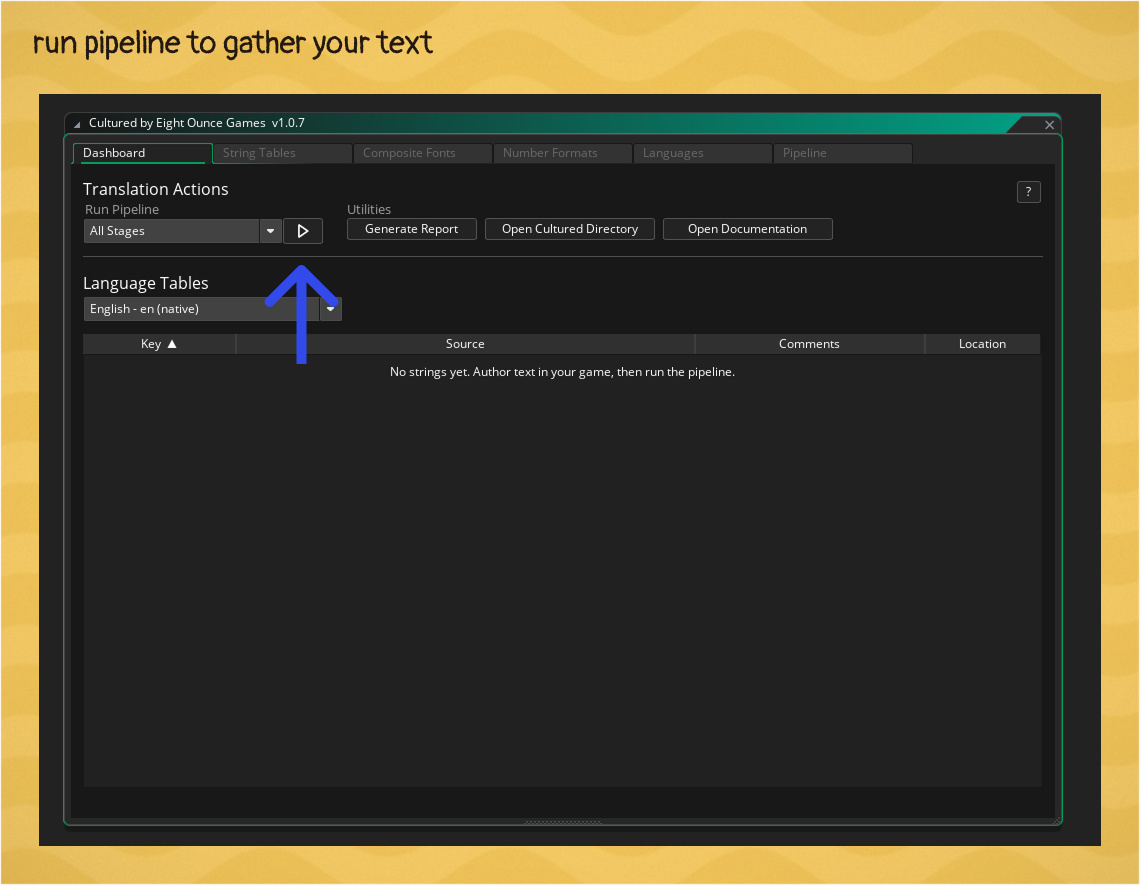
Now that there is a font and a piece of text to localize head to the Cultured Dashboard main Dashboard tab and click the Run Pipeline button. Ensure the dropdown has "Full Pipeline" selected. Once you do this your text will instantly appear in the Cultured Dashboard main tab Language Table. See the Cultured Dashboard reference for more information on these screens.
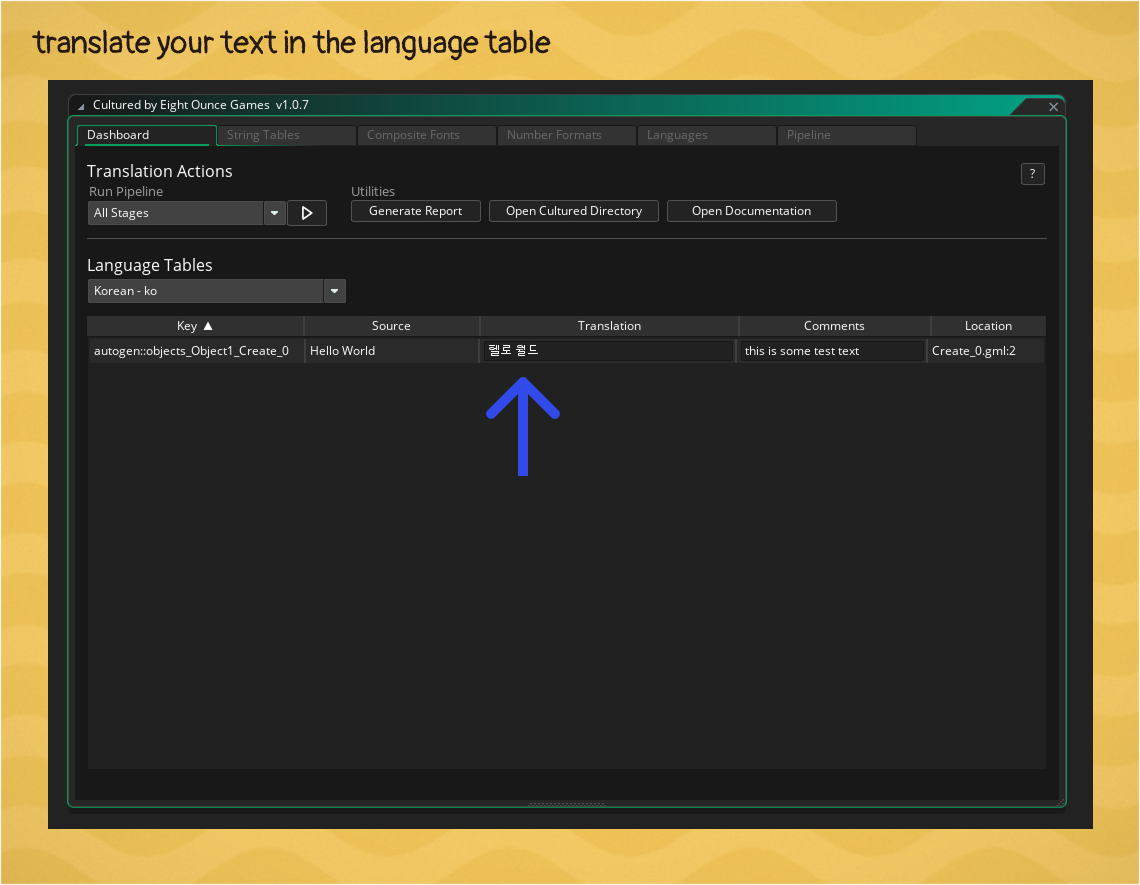
Click "Korean" from the language table selector to see the Korean text. You will see that the text is flagged as red as there is a translation missing. Go ahead and add 헬로 월드 to the translation field.
Compiling Text
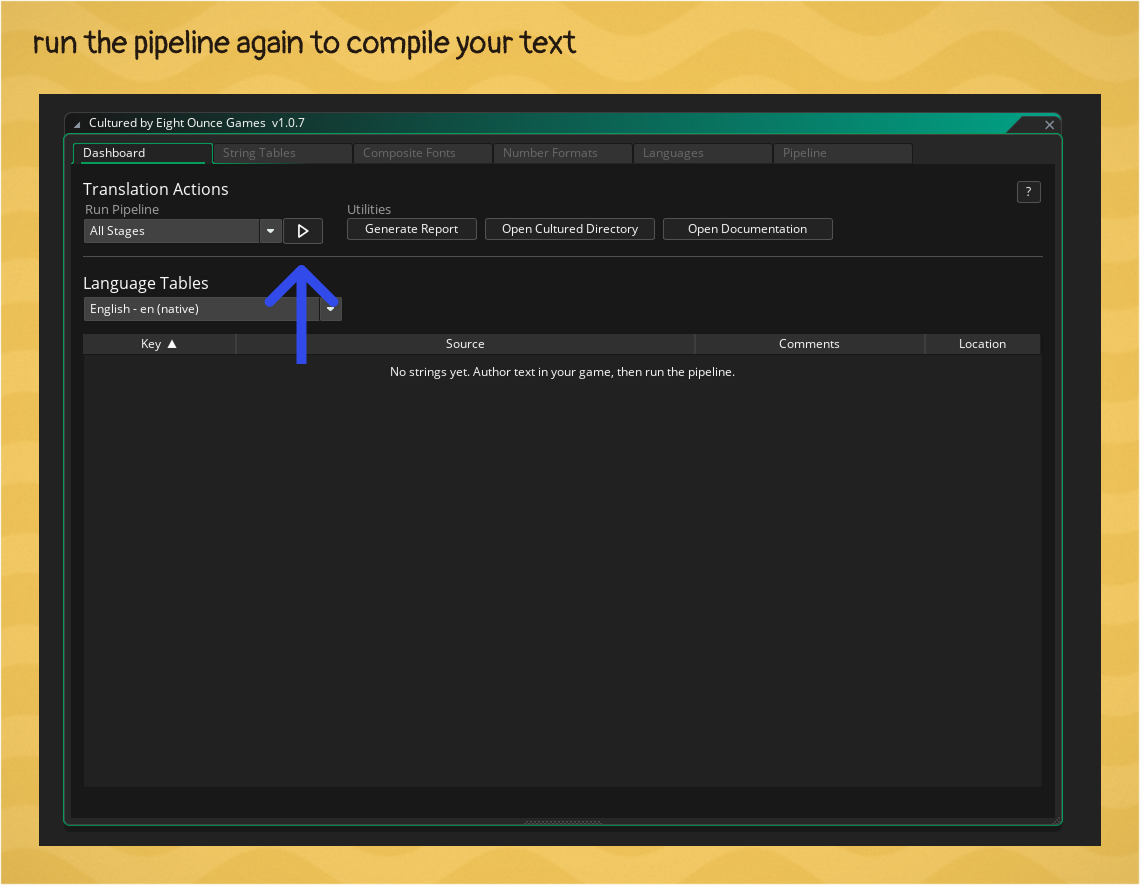
Finally re-run the Cultured Pipeline in the Cultured Dashboard main tab. This will generate a binary file for Game Maker to use for your translations during game time as well as generate the glyph ranges needed in your composite fonts.
Drawing The Text
The last thing to do is draw the text and test it in English and Korean. In your chosen test object add the following code to the draw event.
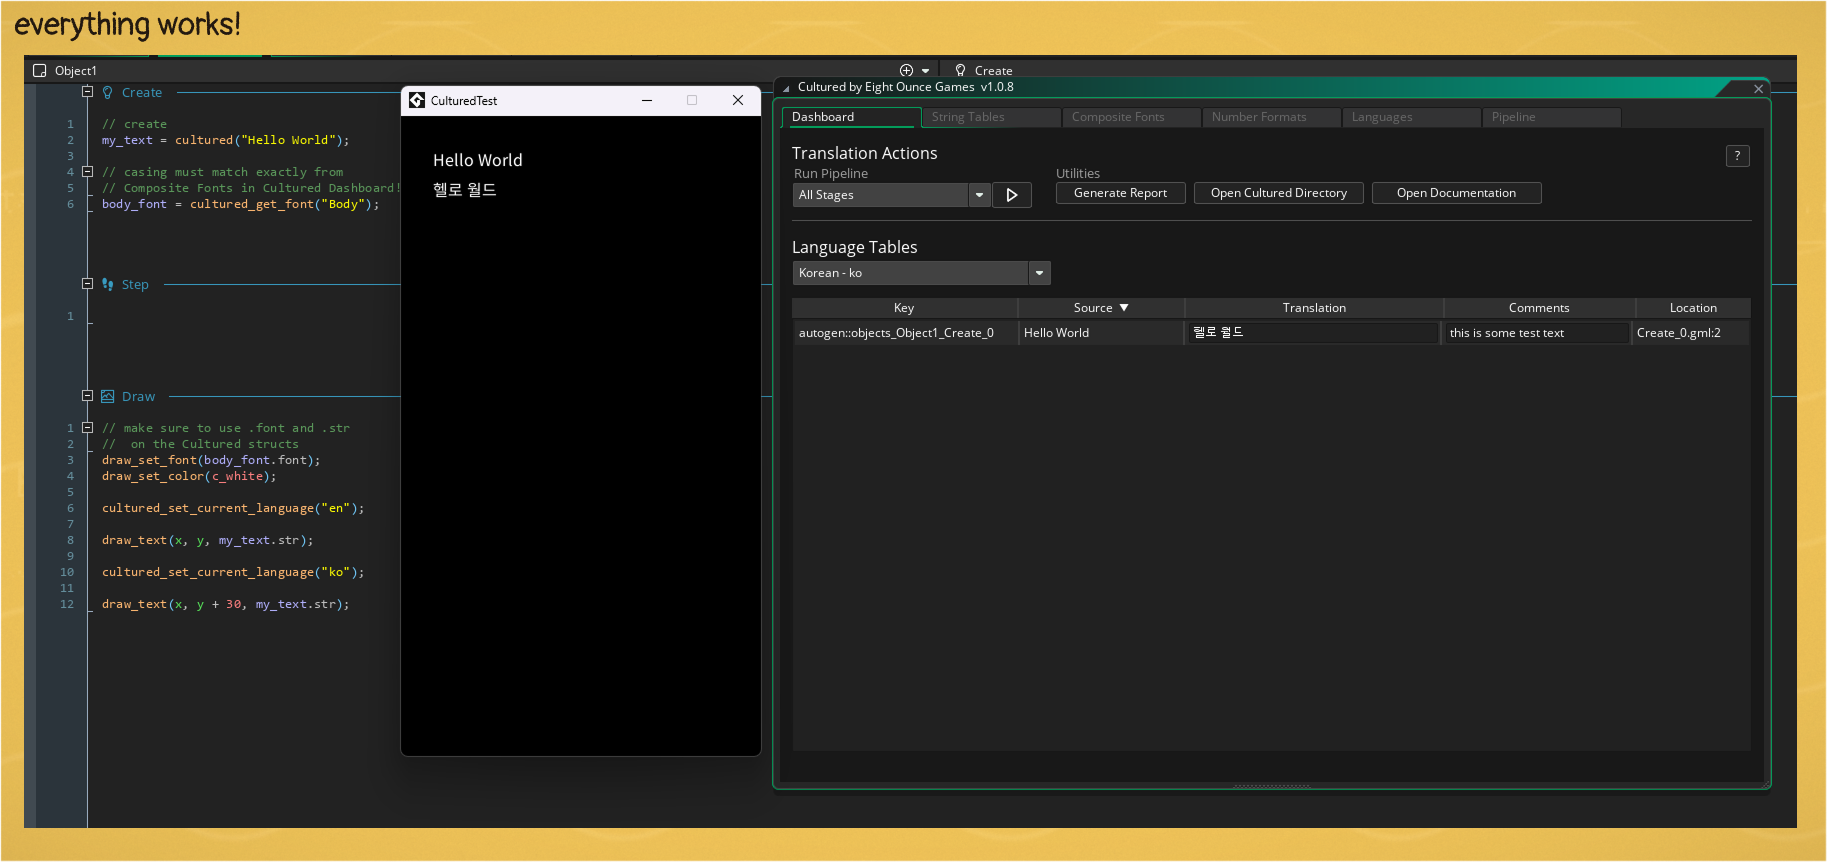
// create
my_text = cultured("Hello World");

 // casing must match exactly from Composite Fonts
 // in Cultured Dashboard!
body_font = cultured_get_font("Body");

// step
if (keyboard_check_pressed(ord("E")))
{
  cultured_set_current_language("en");
} else if (keyboard_check_pressed(ord("K"))) {
  cultured_set_current_language("ko");
}

// draw

// make sure to use .font and .str on the Cultured structs
draw_set_font(body_font.font);
draw_text(x, y, my_text.str);
Adding A Composite Sprite
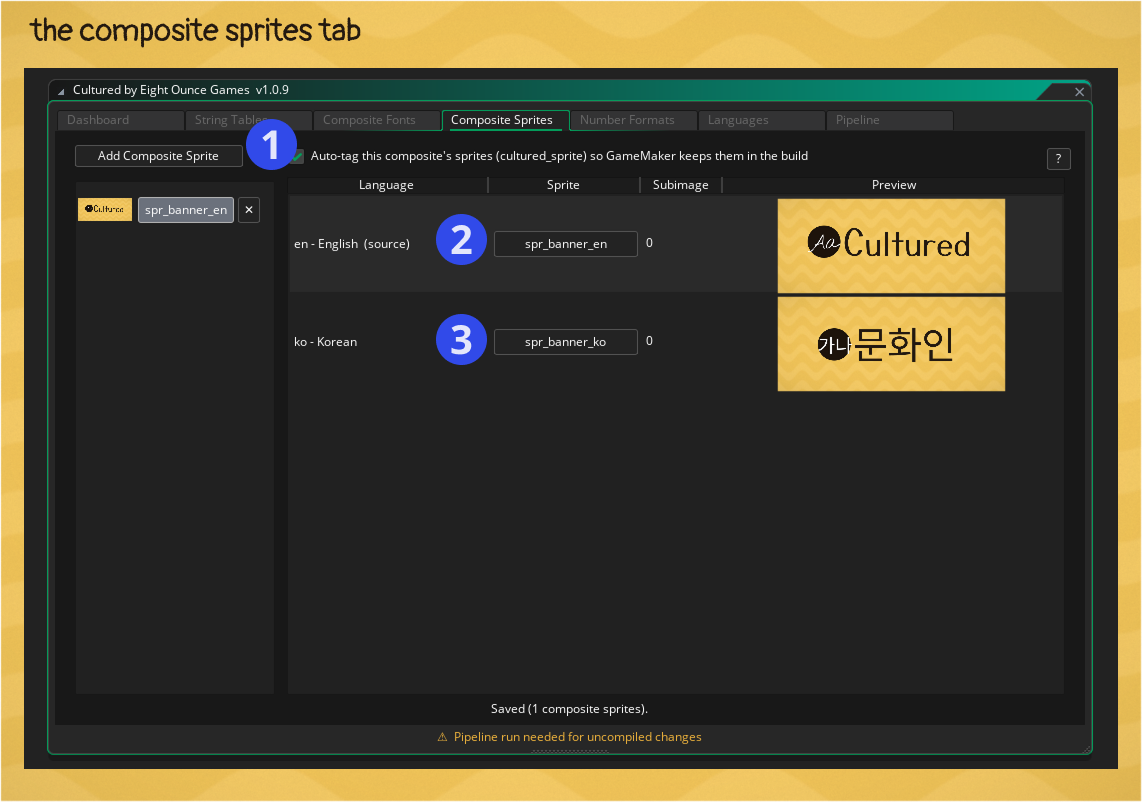
A Composite Sprite is a graphic that contains text that you'd like to swap for every language. The idea works the same as composite fonts.
- Click "Add Composite Sprite".
- In the right hand column select the "Native Sprite", this should be the sprite that contains the English text.
- In the right hand column select the sprite that contains the Korean text and map it to the Korean language.
- Rerun the Cultured Pipeline to generate the data needed to use in the game.
Rendering Composite Sprites
There are no surprises when it comes to looking up and rendering composite sprites. It is done either by the using the native sprite asset or by a string containing the name of native sprite asset.
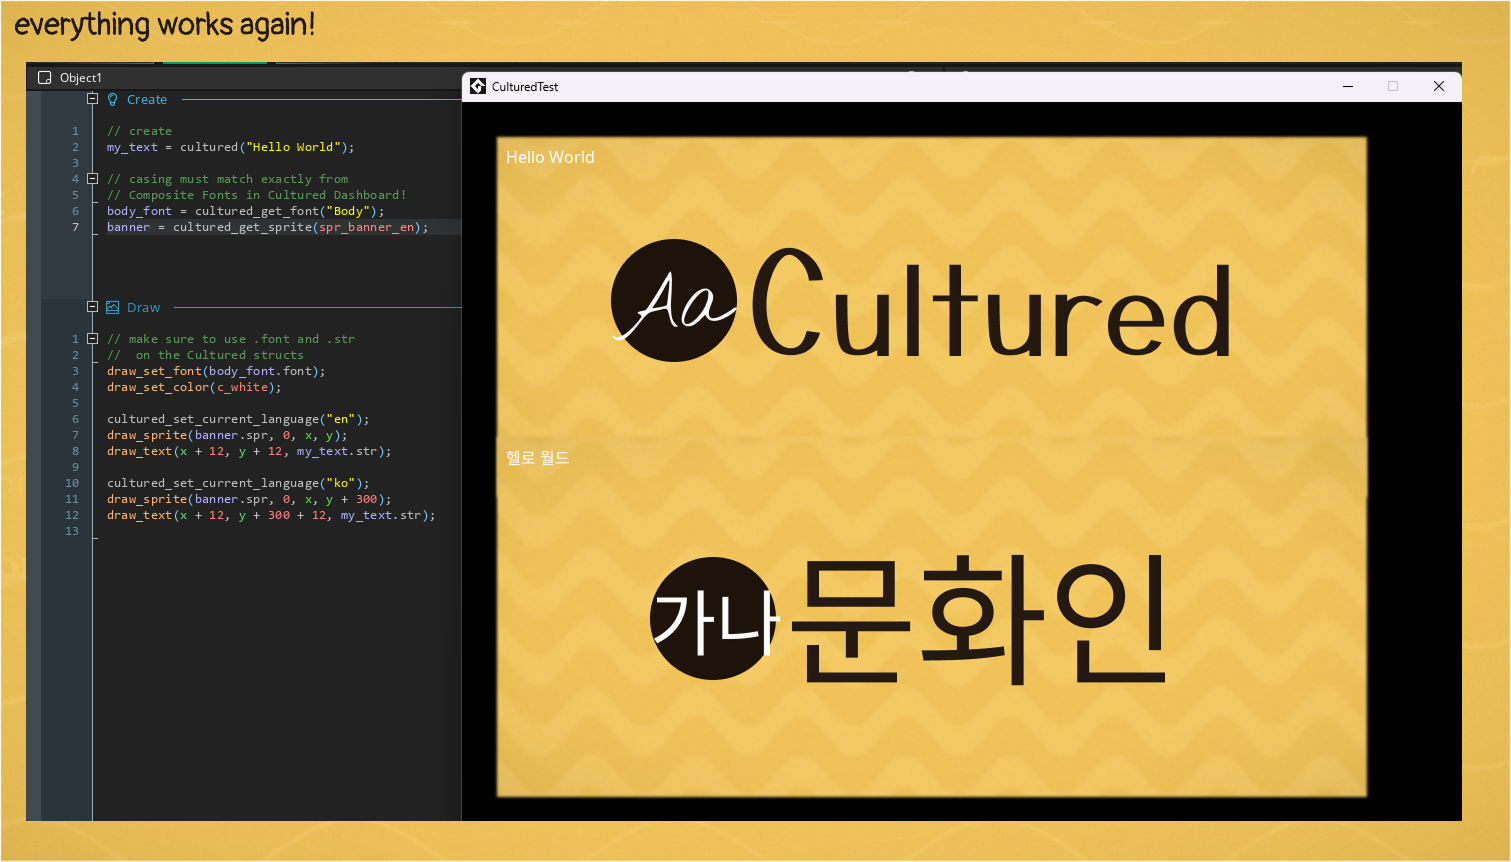
/// create event
// lookup by native sprite asset
banner = cultured_get_sprite(spr_banner_en);

// lookup by name of native sprite asset
banner = cultured_get_sprite("spr_banner_en");

/// draw event

// (!) this section uses the variables for font
// from the earlier sections of the guide

draw_set_font(body_font.font);
draw_set_color(c_white);

cultured_set_current_language("en");
draw_sprite(banner.spr, 0, x, y);
draw_text(x + 12, y + 12, my_text.str);

cultured_set_current_language("ko");
draw_sprite(banner.spr, 0, x, y + 300);
draw_text(x + 12, y + 300 + 12, my_text.str);